There are numerous aspects that go into a pre-trip inspection depending on the class of commercial driver’s license obtained. Having a CDL or operating a fleet is a responsibility, therefore, it is critical to be educated on the different types of classes for CDL inspections to be fully prepared. There are specific pre-trip inspections that need to be completed in order to successfully operate a Class B vehicle. Knowledge is power in the fleet industry and forgetting important details can be consequential.
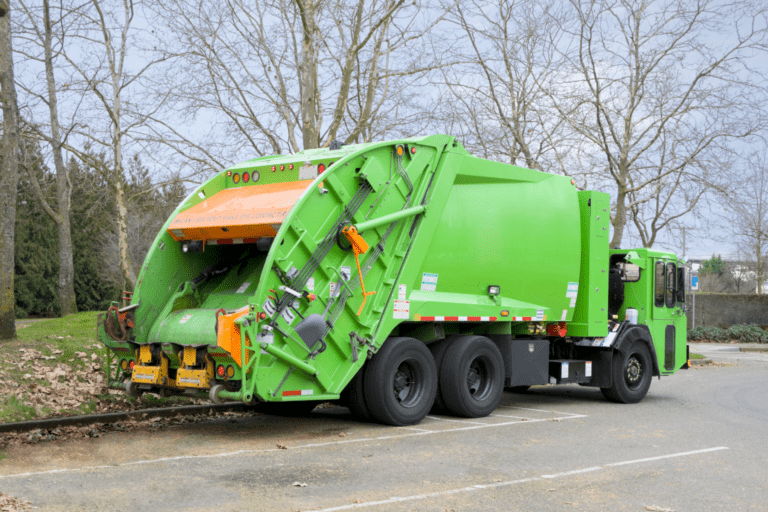
A Class B CDL allows the driver to operate a commercial vehicle greater than 26,000 pounds. Operating a vehicle of any kind is a responsibility, but operating a Class B vehicle requires specific pre-trip inspections.
Things to Consider Before Starting Your Inspection
Before starting a Class B CDL inspection it is important to identify the item under inspection by touching the vehicle part or pointing to the aspect under inspection. The driver will need to verify that the part under inspection is in good condition. Make notice of any and all defects caught during the inspection. Logging any defect is essential to the process so that the driver will receive proper credit.
Inspect the Outside of the Truck
- Hood and Doors: Make sure the hood is not damaged and is securely locked. Doors should open and close properly. Check that the hinges aren’t broken or bent and that the seal is in place and shows no signs of damage.
- Steps: These should be mounted securely, with no excessive debris and no missing hardware.
- Fuel Tank: Make sure the fuel tank is securely mounted and not leaking. The cap should be tight and the seal intact. Check to make sure the safety chain is in place.
- Windshield: The windshield, like the lights, should be clean and not cracked or broken in any way.
- Bumper: Lastly, the bumper should be well-mounted, and in good condition. A registration plate should also be clean and visible with a valid sticker to pass inspection.
Leaks, Leans, and Lights
- Leaks: Before opening the hood, inspect under the truck. When inspecting under the truck ensure there are no wirings hanging or out of place and that there is no leaks present. There are two types of leaks that can appear. The first leak is one from the transmission or engine. The other leak could be fluid from the power steering or cooling system.
- Leans: Once confirmed that nothing is leaking, check that the truck itself isn’t leaning. If it is, that could indicate a suspension problem or low tire pressure.
- Lights: Finally, it’s time to check the lights on the top and front of the truck. The lights should not only be in working order, but the lights should be the proper color, clean, and not broken or cracked.
Wheels
- Tires: Inspecting tires is a visual assessment, but it’s important to pay close attention. First, ensure that no bubbles or cuts are present. Then check that there is no space between the tires and the rims. Lastly, make sure the air pressure is correct and that the tread is worn evenly.
- Rim: The rim should show not be bent or show signs of cracks or welding repairs.
- Lug Nuts: Lug Nuts should be tightly in place, with no shiny threads or rust trails. There should be no signs of cracks or breaks. All lug nuts must be present.
- Valve Stem: Finally, the valve stem should be securely mounted, with a metal cap, and should not be damaged in any way.
Fluid Check
- Coolant Reservoir: First, take a look at the coolant reservoir. Here, the inspector is checking to make sure the coolant is at a proper level, the reservoir is mounted securely, and there are no leaks. Check the hose for signs of damage, and make sure that it, too, is securely mounted.
- Oil: Next, move on to the oil. The inspector should describe the procedure for checking the oil. First, remove the dipstick, wipe it completely clean, then re-insert the dipstick into the oil, remove, and check the level. The correct oil level is at, or below FULL but above ADD.
- Power Steering Reservoir: Finally, the inspector should check the power steering reservoir. Indicate where the dipstick is located and make sure the power steering is at the proper level. Check that the reservoir is not leaking and is securely mounted. The hose should show no signs of leaks or damages, and it too should be properly mounted.
Engine Components
- Alternator: The alternator should be securely mounted without any signs of damage. No bolts or parts should be missing. Wires must have good connections, without any fraying. Belts should have no more than ¾ inch of play and should show no signs of fraying or cuts.
- Water Pump: To locate the water pump, follow the bottom radiator hose. The pump should be securely mounted without any signs of damage or leaks. Hoses should not be leaking and must be securely attached. Belts should show no signs of being cracked, frayed, cut, or damaged in any other way. Belts should have more than ¾ inch of play.
- Air Compressor: Finally, check to make sure the air compressor is securely mounted, without any signs of damage and no audible leaks. There should be no missing bolts or parts. The compressor belt should show no signs of damage or fraying. Make sure the best has no more than ¾ inch of play.
Steering
- The Steering Shaft: Ensure that the shaft is securely mounted without excessive play and shows no signs of damage.
- The Power Steering Box: The box should be mounted to the frame without damage. Check that no leaks are present.
- The Pitman Arm: The pitman arm should be securely mounted without damage or cracks. Castle nuts and cotter pins must be present and without damage.
- Drag Link: When inspecting the drag link, make sure it is properly secured, without damage, and that the rubber bushings show no signs of damage.
- Upper and Lower Control Arms and Tie Rod: Finally, check that these are not bent or broken and that all hardware is present and securely mounted.
Suspension

- Spring Mounts: There are front and rear spring mounts. Both should be securely mounted to the frame with no signs of damage.
- Leaf Springs: It’s important that the leaf springs are not t missing, cracked, or broken, but the inspector should check to make sure the leaf springs are not shifting (scissoring) either.
- Shock Absorber: Make sure the shock absorber is mounted securely and not bent or dented. Check for leaks. Lastly, make sure the rubber bushings are not worn.
- U-Bolts: U-bolts t should not be broken, cracked, missing, or loose.
Brakes
- Air Hose to Brake Chamber: Check to make sure the air hose to the brake chamber is mounted securely at both ends and shows no signs of splits or cuts. Also, check for leaks.
- Brake Chamber: Check to make sure that the brake chamber shows no damage, is mounted securely and is not leaking.
- Slack Adjuster: Check that the pushrod is at a 90-degree angle to the chamber and that there is no more than 1 inch of free play at the pushrod with the brakes released. Also check for dents, breaks, and loose or missing parts.
- Brake Pads: Brake pads should show no signs of breaks or cracks and should be mounted securely. Check that the brake pads have a minimum of ¼ inch pad depth. Also check for signs of heat, such as cracking or glazing.
- Brake Drums: Check for cracks or bending, and ensure that the brake drums are mounted securely. Next, check for oil leaking from an inner oil seal. Ensure that the brake drum is free of debris and that there is no blueing from excessive heat.
Check the Cab of the Truck
- Mirrors: Mirrors inside and outside the vehicle must be checked. All mirrors should be properly adjusted, clean, and damage free.
- Wipers: Both the arms and blades on the wipers should be securely mounted with no damage. Don’t forget to check the wiper fluid.
- Heater/Defroster: Simply make sure that the heater and defroster work properly.
- Dashboard Indicator Lights: Ensure that both left and right turn signals are functioning. Then check 4-way flashers and high beams.
- Learn More About Class B CDL Pre-Trip Inspections
It may seem exhausting, having to check so many items on a large truck for Class B CDL pre-trip inspection, but it’s vital for driver safety and the safety of others on the road. Having a DOT Pre-trip Inspection Checklist ensures that every step of the inspection is followed. To make inspecting fleet vehicles, equipment, and other assets a little easier and more manageable, please don’t hesitate to contact us today to start your free trial.