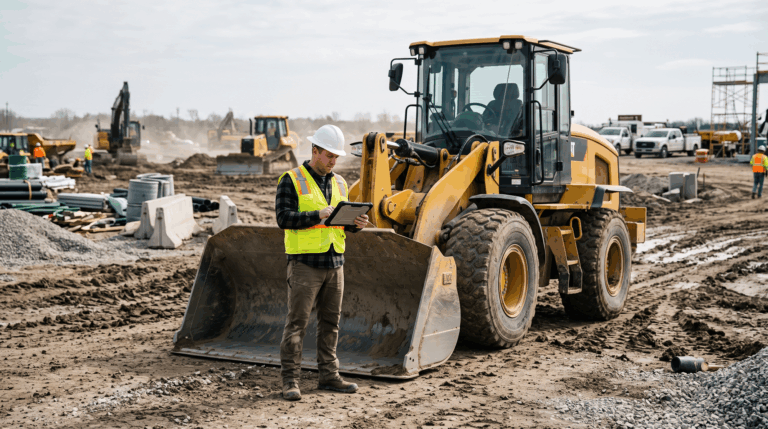
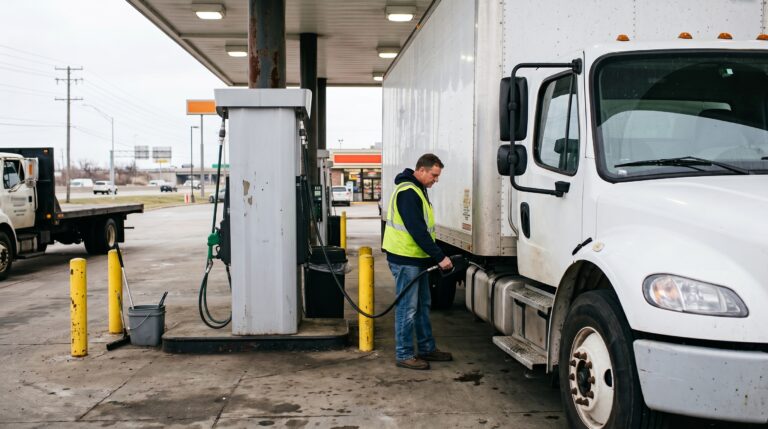
A skid steer that looks fine from ten feet away can still have a cracked hydraulic hose, a loose coupler pin, or a bypassed seat bar interlock. According to NIOSH surveillance data on skid-steer loader fatalities, the majority of these incidents involve an operator or bystander getting pinned between the bucket and frame or the lift arm and frame, which is exactly the kind of failure a two-minute walkaround is built to catch. On a jobsite where the same machine gets handed off between operators, attachments swap out weekly, and hours pile up fast, skipping that walkaround is how a small defect turns into a lost-time injury or an unplanned repair bill.
This guide gives you a free, printable skid steer inspection checklist to run before every shift, walks through exactly what to check on each part of the machine, and covers how often inspections should happen, what counts as a passing inspection, and what to do when a machine doesn’t pass. Whether you’re running one skid steer out of a single yard or coordinating a mixed fleet of loaders across several jobsites, the same six-step process applies.
Free Skid Steer Daily Inspection Checklist PDF
A skid steer inspection checklist is a structured list of daily checks covering the machine’s exterior, undercarriage, fluids, attachments, cab, and safety systems that an operator completes before starting work each shift to confirm the machine is safe and ready to run.
Use the quick-reference version below on the shop floor or in the cab, then grab the full printable PDF to keep with the machine or attach to your paper or digital inspection process.
Free Skid Steer Daily Inspection Checklist PDF – Click Here
Walk around the machine and check for fresh leaks, cracks, dents, or missing safety decals
- Inspect tire pressure and tread (or track tension and wear) and the undercarriage for debris
- Check engine oil, coolant, hydraulic fluid, air filter, belts, hoses, and the fuel/water separator
- Inspect loader arm pivot pins, the bucket or attachment cutting edge, and the quick-attach coupler
- Check the ROPS/FOPS structure, seat, seatbelt, mirrors, and lift-arm support device
- Start the machine and test the interlock system, horn, backup alarm, lights, steering, and brakes
Skid Steer Daily Inspection Checklist: What to Check Before Every Shift
Run the inspection in the same order every time so nothing gets skipped when you’re moving fast in the morning. Start with a cold walkaround before the engine is running, move into fluid, undercarriage, and attachment checks, and finish by starting the machine to test the systems that only reveal problems once it’s powered on. Most operators can work through all six steps in ten to fifteen minutes once the routine becomes habit.
1. Walk Around the Machine and Check for Damage or Leaks
Walk a full loop around the machine before you climb in. Look underneath for fresh drips or puddles of hydraulic fluid, engine oil, or coolant. A machine that was clean in the yard last night and has a puddle under it this morning has a leak worth tracing before it gets worse, not after a hose lets go mid-lift. Check the frame, panels, and guards for cracks, dents, or loose fasteners, and confirm safety decals and warning labels are still legible and haven’t peeled off or faded past the point of being readable. This same walkaround structure is the backbone of most heavy equipment inspection checklists, not just skid steers, because a visual sweep is the fastest way to catch a problem before it costs real money.
2. Inspect the Tires, Tracks, and Undercarriage
For wheeled skid steers, check tire pressure against the manufacturer’s spec and look for cuts, sidewall bulges, or missing lug nuts. For compact track loaders, check track tension and look for excessive wear, cracking, or embedded debris between the track and the rollers. Either way, look under the machine for cracks in the frame or drive motor housing, and clear out any built-up mud, rock, or debris that can hide damage or cause components to run hot. A machine that’s been working in wet or rocky conditions all week needs this check even more than one that’s been sitting on a clean slab.
3. Check Engine Fluids, Filters, Belts, and Hoses
With the engine cold, pull the dipstick to check engine oil level and condition, and check the coolant reservoir without opening a pressurized radiator cap. Verify hydraulic fluid is at the correct level and that reservoirs and lines show no signs of leaking, since hydraulics do most of the work on a skid steer and a low fluid level shows up as sluggish or jerky arm movement fast. Check the air filter service indicator and clear debris from the housing and cooling fins, feel for loose or cracked drive belts, and inspect hoses for dry rot, bulges, or abrasion where they rub against other components. If the machine has a fuel/water separator, drain off any moisture or sediment buildup before it reaches the injectors.
4. Inspect the Loader Arms, Bucket, and Attachments
Check loader arm pivot pins and cylinder mounts for excessive play, and look at the bucket or attachment cutting edge for cracks, bends, or heavy wear that’s changing how the machine performs. If the machine is running a different attachment than it was yesterday, confirm the quick-attach coupler is fully locked with both pins engaged, and check auxiliary hydraulic couplers for leaks or damage. A loose coupler is one of the more common causes of an attachment separating from the machine mid-task, so don’t skip this step just because the attachment “looked locked in” from a few feet away.
5. Inspect the Cab and Operator Safety Equipment
Check that the ROPS/FOPS structure is free of cracks or damage at the mounting points, since this is what protects the operator in a rollover or from falling material overhead. Confirm the seat is secure and the seatbelt latches and retracts without damage or fraying. Clean the cab glass, mirrors, and backup camera lens so the operator has full visibility in every direction, and confirm the lift-arm support device is present and usable before anyone needs to work underneath a raised arm.
6. Start the Skid Steer and Test Its Safety and Operating Systems
Once you’re seated with the seatbelt fastened, test the interlock control system by confirming the lift and tilt functions do not respond unless the seat bar is lowered (or the seatbelt is buckled, depending on the model) and the operator is properly seated. Never operate a machine with this system bypassed or disabled; it exists specifically to keep hands and bodies away from the lift arm’s pinch points. Test the horn, backup alarm, and work lights or strobes, check steering responsiveness, and confirm the parking brake holds on a slight grade. Cycle the lift, lower, dump, and curl functions at low speed before you move the machine, and note any fault codes on the display before you start work.
How Often Should You Inspect a Skid Steer?
A skid steer should get a full inspection before every shift it’s used, no matter how routine the day’s work looks or how familiar the operator is with the machine. OSHA doesn’t publish a skid-steer-specific inspection standard, but the General Duty Clause and 29 CFR 1926.20(b)(2) both point in the same direction: employers are expected to keep equipment free of recognized hazards through frequent, competent-person inspections, and a documented pre-shift check is the accepted way fleets meet that expectation.
Daily pre-shift checks aren’t the only inspection interval that matters. Most manufacturers also publish maintenance schedules tied to operating hours, commonly at the 50, 100, 250, 500, and 1,000-hour marks, that call for deeper checks like hydraulic filter replacement, belt changes, and full fluid service. Layering manufacturer-interval maintenance on top of daily inspections is the same approach recommended in Whip Around’s broader heavy equipment inspection best practices and construction equipment inspection checklist guidance. Daily checks catch what changed since yesterday; scheduled maintenance catches what wears down gradually over hundreds of hours. Machines that rotate between multiple operators, get rented out, or run in harsh conditions like mud, gravel, or waste facilities deserve extra attention between those scheduled intervals, since wear and tear doesn’t wait for a round number on the hour meter.
What Should You Do If a Skid Steer Fails an Inspection?
If an inspection turns up a defect, especially anything involving the hydraulic system, ROPS, seatbelt, interlock system, or brakes, take the machine out of service immediately. Tag it clearly so nobody else climbs in and starts it up, log the defect with as much detail as possible, including photos if you can get them, and route it to whoever manages repairs so it becomes a documented work order rather than a verbal heads-up that gets forgotten by lunch.
Resist the urge to run the machine “for one more job” on a defect that isn’t safety-critical. Small issues like a slow leak, a worn belt, or a cracked mirror are exactly what regular preventive maintenance for construction equipment is designed to catch before they become a breakdown in the middle of a job. Equipment downtime on construction sites can run anywhere from $450 to $760 an hour depending on the machine, so a defect caught in a five-minute inspection is almost always cheaper, and safer, than the same defect caught mid-shift with a job half finished.
It also helps to have a clear, written policy for what “failed” means on your team, rather than leaving it up to each operator’s judgment in the moment. A defect that would be a minor annoyance on a delivery van, like a worn wiper blade, is a different category of risk on a machine with exposed pinch points and a raised lift arm. When the standard is written down and applied the same way every time, operators spend less time guessing whether something is worth flagging.
Make Skid Steer Inspections Easier to Track With Whip Around
Paper checklists work until they don’t. A form gets left in a truck, a defect gets mentioned verbally but never logged, or nobody can say for sure when a specific skid steer was last inspected or by whom. Whip Around lets you build a digital inspection form for skid steers and any other equipment in your fleet, so operators complete the same checklist on a phone or tablet every shift, attach photos of anything that looks off, and submit it in about the time it used to take to find a pen.
When an operator flags a failed item, Whip Around’s defect-to-work-order automation turns that failed line item into a work order automatically, so it lands with your shop instead of sitting in a truck cab or a drawer. Fleet managers get a compliance dashboard showing which machines were inspected today, which ones have open defects, and which have gone too long without a check. AI Inspections Pro can also review submitted inspection photos and flag issues a reviewer might otherwise miss, which matters when one person is reviewing inspections for a fleet of dozens of machines. For teams managing skid steers alongside trucks, trailers, and other jobsite equipment, that visibility is part of what construction fleet management software is meant to solve: one place to see the health of everything you run, not just the assets with a license plate.
If your team is still tracking skid steer inspections on paper or in a spreadsheet, it’s worth seeing what a digital process looks like in practice. Book a demo or start a free trial to see how Whip Around fits into your existing inspection routine.
Skid Steer Inspection Checklist FAQs
What should be included in a skid steer daily inspection checklist? A skid steer daily inspection checklist should cover a visual walkaround for leaks and damage, tire or track condition, engine fluids and filters, loader arm and attachment condition, cab and operator safety equipment like the ROPS and seatbelt, and a startup test of the interlock system, alarms, lights, steering, and brakes. Each category should be checked in the same order every time so nothing gets rushed or skipped.
Should a skid steer be inspected every day? Yes. A skid steer should be inspected before every shift it’s used, since conditions like fluid leaks, tire damage, or a loose coupler pin can develop overnight or during the previous shift’s work, even if the machine ran fine the day before. Daily checks should be paired with the manufacturer’s scheduled maintenance at set operating-hour intervals.
Can I use the same inspection checklist for every skid steer? The core categories (leaks, tires or tracks, fluids, attachments, cab safety, and startup systems) apply to nearly every skid steer on a jobsite, but exact specs like tire pressure, fluid types, and attachment coupler style vary by make and model. Use one master checklist structure across your fleet and reference each machine’s operator’s manual for model-specific specs, especially if your fleet mixes brands or older and newer models with different interlock designs.
What should I do if I find a defect during a skid steer inspection? Take the machine out of service if the defect involves a safety system like the ROPS, seatbelt, interlock, or brakes, document the defect with details and photos, and route it to your maintenance team as a work order. Non-critical defects should still be logged and scheduled for repair rather than left off the record until they get worse.